

If you follow me on Instagram you probably saw this Nut Free Chocolate Birthday Cake post coming.
I took a picture of my birthday cake a few days ago and shared it with all of my Instagram followers. I felt compelled to share my treat-driven excitement, because I could not handle the cuteness or the yumminess of what was in front of me!
My caption said I’d be posting the recipe sometime soon, so here I am, ready to share how to make this wonderful dessert.
 This rich, smooth, nut-free, dairy-free, gluten-free cake was prepared by yours truly as a treat to enjoy after dinner on the night of my birthday. It turned out delicious and it was not hard to make at all. I made it the night before to avoid having to spend anytime during my birthday baking in the kitchen…and also made it the night before, so that it would stay as fresh as possible. If you’re having a birthday soon, I recommend you do the same. It was the most convenient thing to do, and was also very stress free.
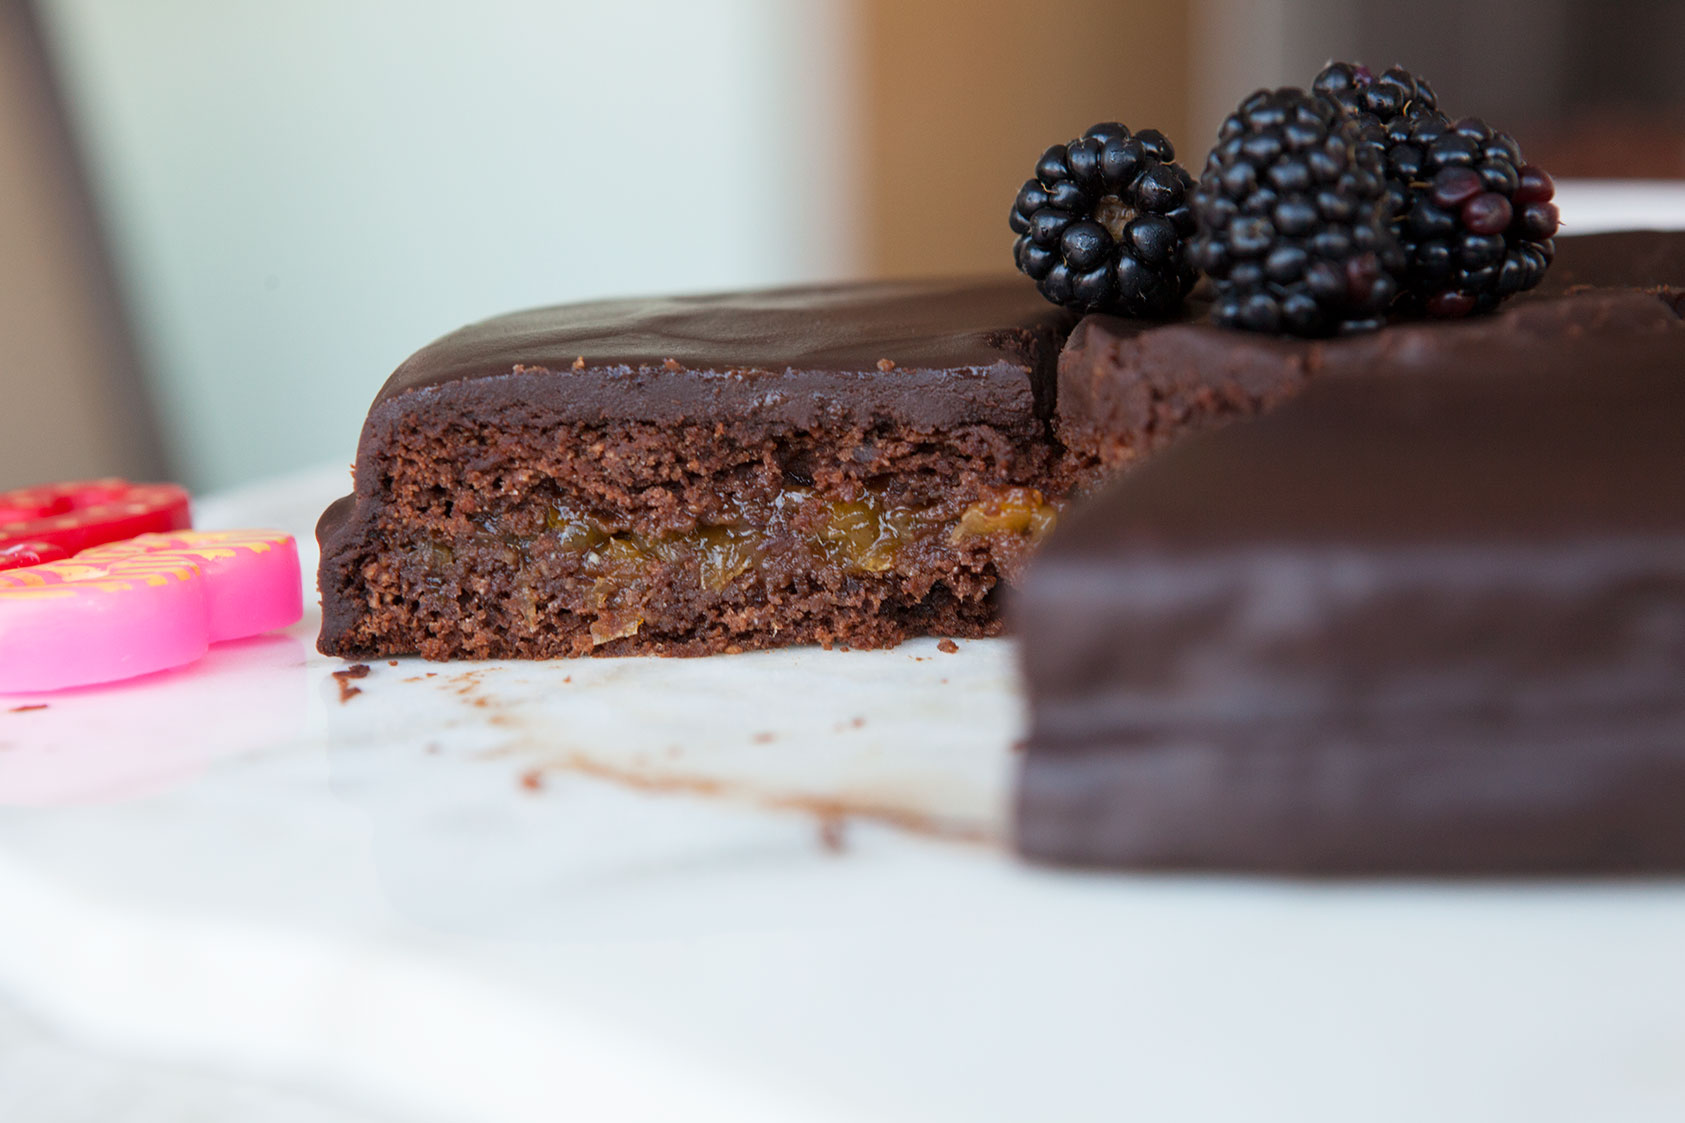
 After the cakes were done baking and cooled off completely, I transferred one of the cakes onto the cake’s serving dish and added apricot jam on top. Then, I added the second cake on top to make it a two-layered cake. I also topped the cake off with a thin layer of apricot glaze and dark chocolate ganache, which was perfect, because the ganache hardened overnight in the refrigerator and it gave my cake a very slick, professional look (score). It was seriously beautiful. Nothing better than having a cute cake for your birthday.
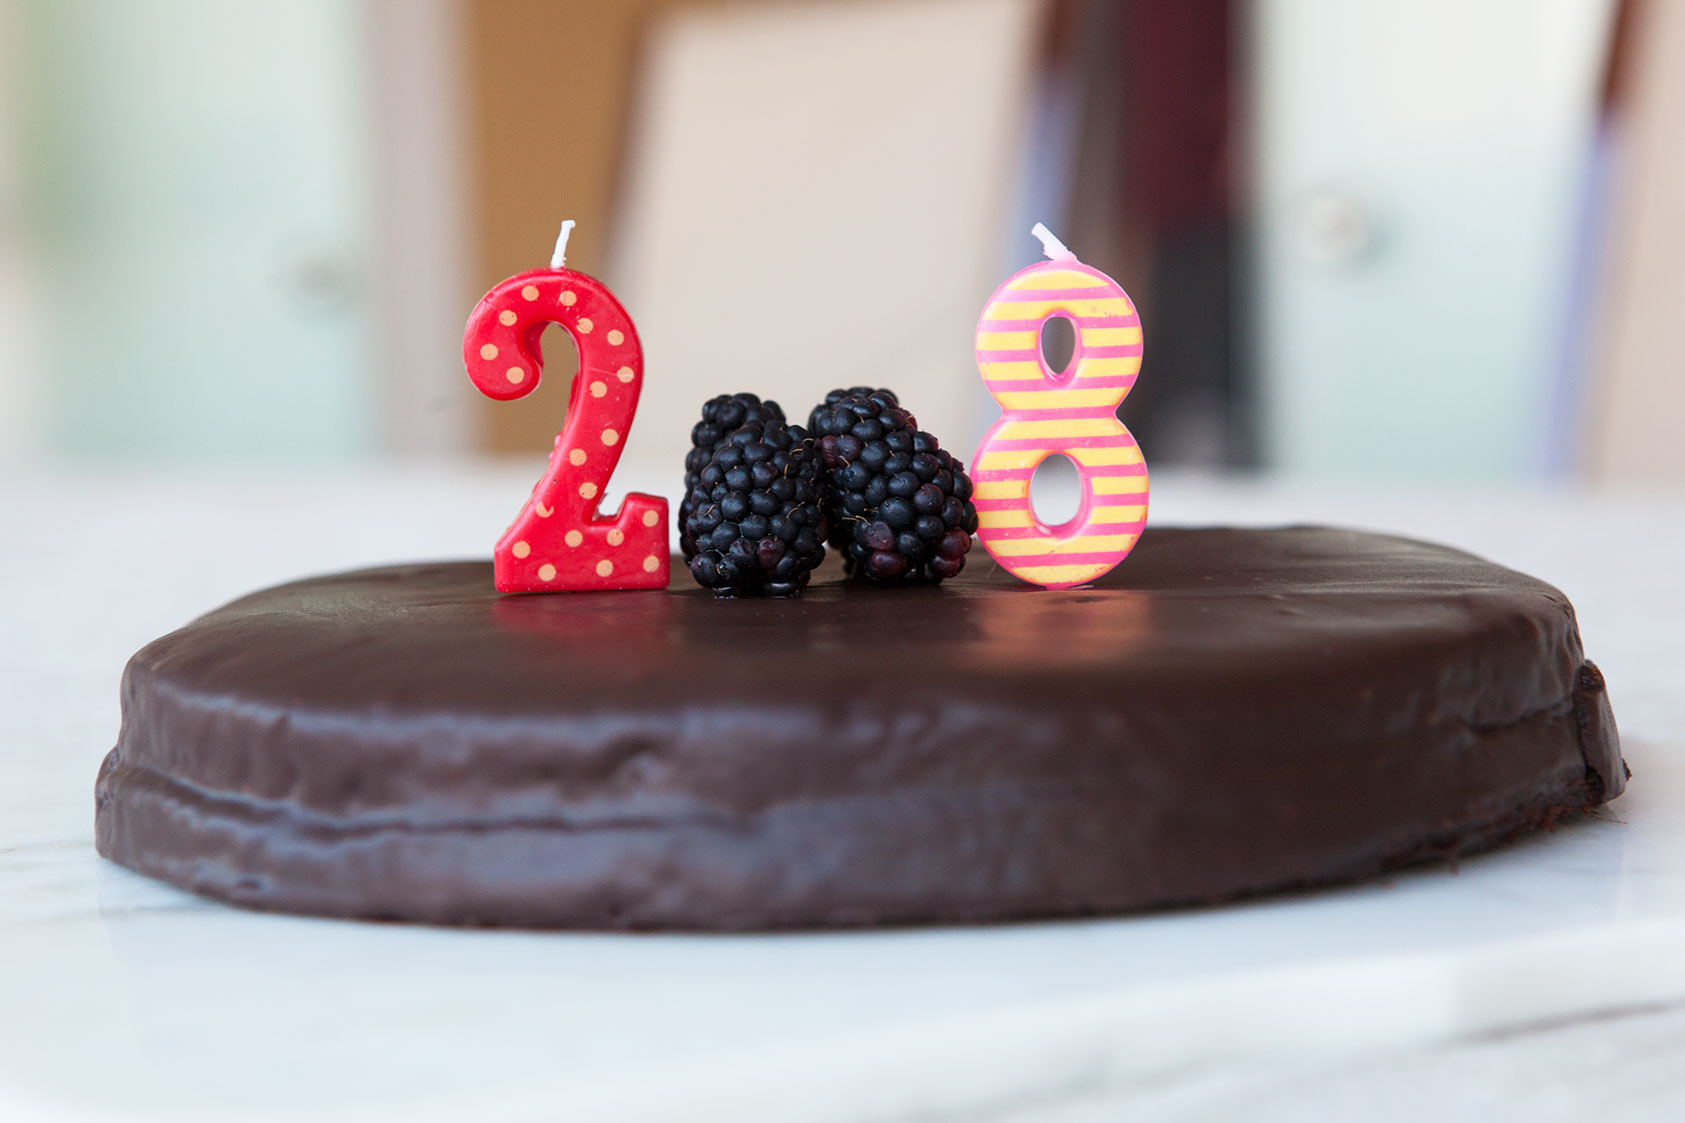
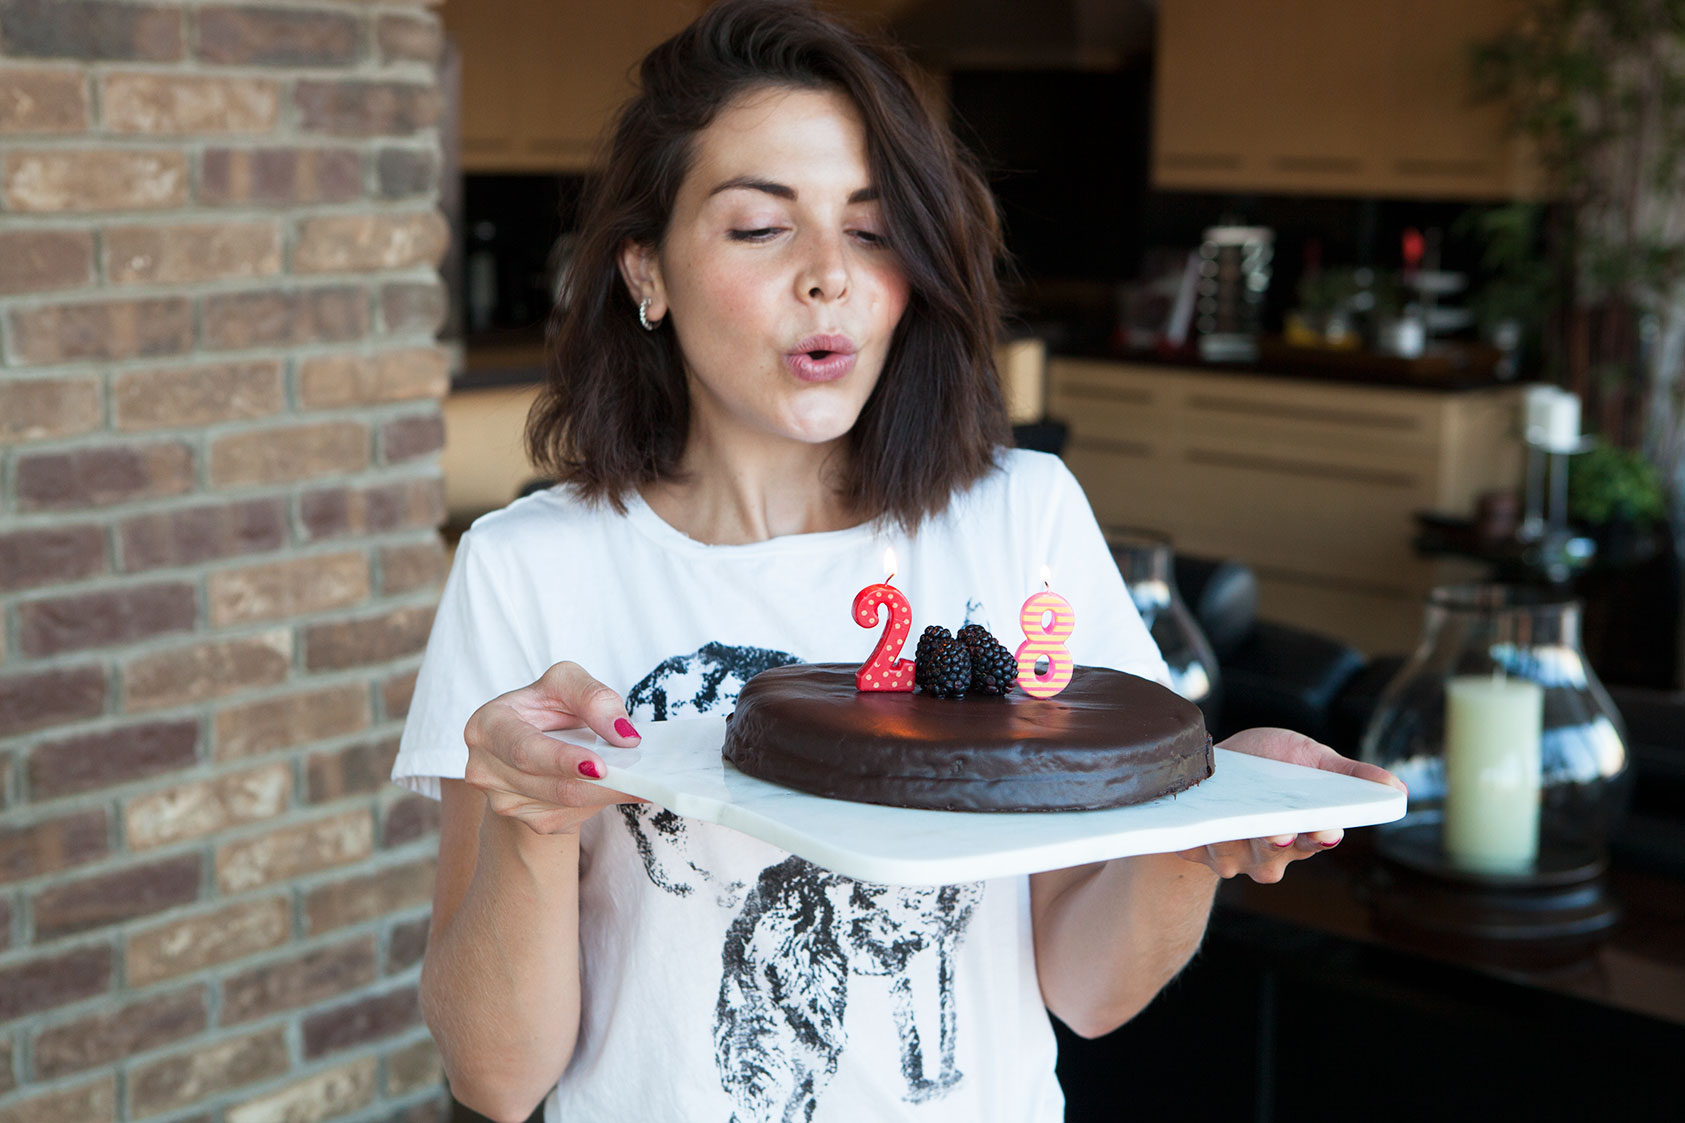
On the day of my birthday, and after dinner was over, we topped the cake with some fun candles; a “2” and an “8” sat neatly on top of the ganache. Yup, I am getting old. However, while I was sitting on the dinner table and had this cake in front of me with all of the candles lit on, I felt like I was 10 all over again…there is something magical about making wishes and being celebrated that makes age irrelevant. Birthdays rock, don’t you agree?
If you have a birthday coming up, or someone in your family has a birthday coming up, give this cake a try. You can always use another type of jam in the middle, if apricot is not your favorite (any berry or orange jam would work great here).
Nut Free Chocolate Birthday Cake
- Total Time: 55 mins
- Yield: 12 slices 1x
Description
This Nut-Free Chocolate Birthday Cake is a wonderful cake for a celebration. Made with coconut and arrowroot flours.
Ingredients
- 1 cup coconut flour
- 1/2 cup cocoa powder
- 2 tbsp arrowroot powder
- 1 1/2 tsp baking soda
- 1/2 tsp sea salt
- 1 cup full fat canned coconut milk
- 1 cup maple syrup
- 6 eggs
- 1/2 cup ghee
- 2 tsp apple cider vinegar
- 2 tsp vanilla extract
- 1 cup organic apricot jam
- 1 cup dairy free chocolate chips
- 1/3 cup maple syrup
- 1 tbsp cointreau (orange liquor)
- 2 tbsp filtered water
Instructions
Make the cake
- Preheat oven to 325 F. Grease two 9″ cake pans with coconut oil, and line them with cut out circles of parchment paper; set aside.
- Melt the ghee over low heat in a small saucepan; set aside and allow it to cool slightly. In a large bowl, whisk together the coconut flour, arrowroot powder, cacao powder and salt; set aside.
- Separate the yolks from the egg whites. Place the egg whites in the bowl of a standing mixer. Place the yolks in a bowl along with the maple syrup, coconut milk, vanilla extract, apple cider vinegar and melted ghee; whisk to combine and pour over the bowl with the dry ingredients; combine until no lumps remain.
- Use the whisk attachment of a standing mixer, and whisk the egg whites until light peaks are formed. Then, stir in the baking soda to the cake batter, and immediately fold in one third of the beaten egg whites to fluff up the batter. Fold in the reminding egg whites until few streaks of egg whites remain visible.
- Divide mixture into the two lined cake pans and bake for 40 minutes. Once baked, allow cakes to cool completely.
Make the Filling
- Once cakes have completely cooled, transfer one of the cakes to a cake serving platter and spread ½ cup of the apricot jam evenly on top. Carefully top with the other cake, and set aside.
- Make the Apricot and Chocolate Glaze
- Add the remaining ½ cup apricot jam to a small saucepan and heat it up over medium heat until it slightly simmers. Once it liquifies, pour-it into a small bowl over a fine mesh sieve. Immediately, pour the apricot glaze over the top layer of the cake. Use a spoon to spread the glaze into a thin layer. Let it cool for about 10 minutes.
Make the chocolate glaze
- Place chocolate chips in a heatproof bowl. Then, bring maple syrup, orange liquor and water to a boil in a small sauce pan; let it boil for a minute or two, and immediately pour it over the bowl with the chocolate chips. Use a spoon and mix the chocolate until smooth and creamy.
- Pour chocolate over the cake starting at the center, and use a spatula to work the chocolate evenly until the entire cake surface is covered. Allow it to cool in the refrigerator, slice it and serve with a side of Paleo ice cream.
- Prep Time: 15 mins
- Cook Time: 40 mins
- Category: Dessert
- Method: Baking
- Cuisine: American
I’ve recently adopted the Paleo lifestyle as a suggestion from a gf. She had a birthday yesterday and I made this recipe, never baked a cake before in my life, and this came out awesome, thank you for the easy step-by-step guide!
Hi Dave!! Yay, this is wonderful to hear!! So fun that you baked your first cake!!! I hope your friend had a great birthday and hope she liked the cake!! 🙂