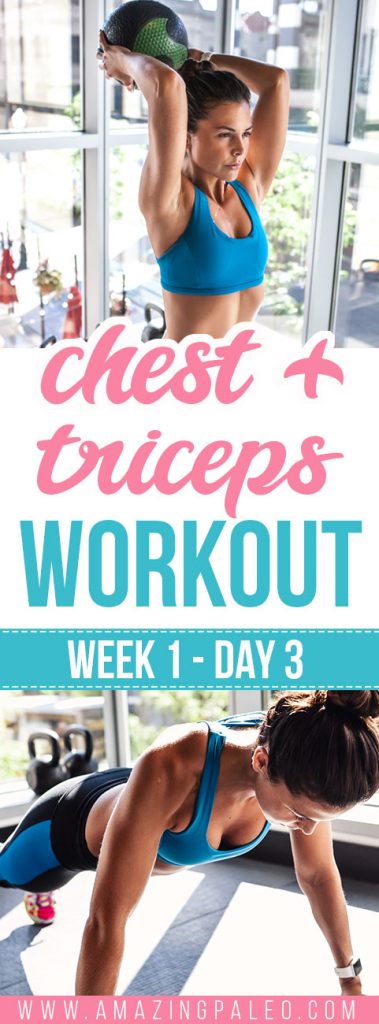
Welcome to Week 1 Day 3 of our 4 Week Workout Program.
This is the third day of our training routine, and the perfect day to do chest, triceps and abs.
This is a great workout routine and one that will help shape your body, but I gotta say, it is a little tough, so be prepared to give it your all! The reason why this one is a bit tough, is because you’re hitting 3 muscle groups as opposed to the regular two we hit on other weight lifting days. On every chest and biceps day, I like to include a little abs action. You know, to get those abs hard as a rock and sport our swimsuit look. A fit girl is only as fit as her abs! Just check any fitness girl on a magazine and tell me what draws your attention first. Chances are it’s her abs.
So go on and work on yours, we’ll have those babies popping in no time.
In order to get a great workout in, I recommend you get a good night’s sleep and drink tons of water before heading to the gym. It’s crazy what these two things can do for your energy and stamina. Also, make sure you don’t eat too much before you workout, as all of your energy might go to your digestive system and you might get a bit nauseous from all the food moving inside while you’re doing your exercises.
So, now, without further ado, let’s jump right to it.
Today we’re going to be doing:
- Incline Dumbbell Flyes
- Dumbbell Flyes
- Cable Crossover
- Cable Triceps Pushdown
- Standing Triceps Extensions
- Cable Lying Triceps Extensions
- Crunches
- Ab Roller
- Air Bike
- Optional: Tabata (aka HIIT cardio)
Below you can find the number of sets and each exercise’s description.
INCLINE DUMBBELL FLYES
2 warm-up sets, 3 sets of 15 reps
30 seconds of active rest in between sets
- Hold a dumbbell on each hand and lie on an incline bench that is set to an incline angle of no more than 30 degrees.
- Extend your arms above you with a slight bend at the elbows.
- Now rotate the wrists so that the palms of your hands are facing you. This will be your starting position.
- As you breathe in, start to slowly lower the arms to the side while keeping the arms extended and while rotating the wrists until the palms of the hand are facing each other. Tip: At the end of the movement the arms will be by your side with the palms facing the ceiling.
- As you exhale start to bring the dumbbells back up to the starting position by reversing the motion and rotating the hands so that the pinky fingers are next to each other again.
- Repeat for the recommended amount of repetitions.
DUMBBELL FLYES
3 sets of 15 reps
30 seconds of active rest in between sets
- Lie down on a flat bench with a dumbbell on each hand resting on top of your thighs. The palms of your hand will be facing each other.
- Then using your thighs to help raise the dumbbells, lift the dumbbells one at a time so you can hold them in front of you at shoulder width with the palms of your hands facing each other. Raise the dumbbells up like you’re pressing them, but stop and hold just before you lock out. This will be your starting position.
- With a slight bend on your elbows in order to prevent stress at the biceps tendon, lower your arms out at both sides in a wide arc until you feel a stretch on your chest. Breathe in as you perform this portion of the movement. Tip: Keep in mind that throughout the movement, the arms should remain stationary; the movement should only occur at the shoulder joint.
- Return your arms back to the starting position as you squeeze your chest muscles and breathe out. Tip: Make sure to use the same arc of motion used to lower the weights.
- Hold for a second at the contracted position and repeat the movement for the prescribed amount of repetitions.
CABLE CROSSOVER
3 sets of 15 reps
30 seconds of active rest in between sets
- To get yourself into the starting position, place the pulleys on a high position (above your head), select the resistance to be used and hold the pulleys in each hand.
- Step forward in front of an imaginary straight line between both pulleys while pulling your arms together in front of you. Your torso should have a small forward bend from the waist. This will be your starting position.
- With a slight bend on your elbows in order to prevent stress at the biceps tendon, extend your arms to the side (straight out at both sides) in a wide arc until you feel a stretch on your chest. Breathe in as you perform this portion of the movement. Tip: Keep in mind that throughout the movement, the arms and torso should remain stationary; the movement should only occur at the shoulder joint.
- Return your arms back to the starting position as you breathe out. Make sure to use the same arc of motion used to lower the weights.
- Hold for a second at the starting position and repeat the movement for the prescribed amount of repetitions.
CABLE TRICPES PUSHDOWN
3 sets of 15 reps
30 seconds of active rest in between sets
- Attach a straight or angled bar to a high pulley and grab with an overhand grip (palms facing down) at shoulder width.
- Standing upright with the torso straight and a very small inclination forward, bring the upper arms close to your body and perpendicular to the floor. The forearms should be pointing up towards the pulley as they hold the bar. This is your starting position.
- Using the triceps, bring the bar down until it touches the front of your thighs and the arms are fully extended perpendicular to the floor. The upper arms should always remain stationary next to your torso and only the forearms should move. Exhale as you perform this movement.
- After a second hold at the contracted position, bring the bar slowly up to the starting point. Breathe in as you perform this step.
- Repeat for the recommended amount of repetitions.
STANDING TRICEPS EXTENSIONS
3 sets of 15 reps
30 seconds of active rest in between sets
- To begin, stand up with a dumbbell held by both hands. Your feet should be about shoulder width apart from each other. Slowly use both hands to grab the dumbbell and lift it over your head until both arms are fully extended.
- The resistance should be resting in the palms of your hands with your thumbs around it. The palm of the hands should be facing up towards the ceiling. This will be your starting position.
- Keeping your upper arms close to your head with elbows in and perpendicular to the floor, lower the resistance in a semicircular motion behind your head until your forearms touch your biceps. Tip: The upper arms should remain stationary and only the forearms should move. Breathe in as you perform this step.
- Go back to the starting position by using the triceps to raise the dumbbell. Breathe out as you perform this step.
- Repeat for the recommended amount of repetitions.
CABLE LYING TRICPES EXTENSION
3 sets of 15 reps
30 seconds of active rest in between sets
- Lie on a flat bench and grasp the straight bar attachment of a low pulley with a narrow overhand grip. Tip: The easiest way to do this is to have someone hand you the bar as you lay down.
- With your arms extended, position the bar over your torso. Your arms and your torso should create a 90-degree angle. This will be your starting position.
- Lower the bar by bending at the elbow while keeping the upper arms stationary and elbows in. Go down until the bar lightly touches your forehead. Breathe in as you perform this portion of the movement.
- Flex the triceps as you lift the bar back to its starting position. Exhale as you perform this portion of the movement.
- Hold for a second at the contracted position and repeat for the recommended amount of repetitions.
CRUNCHES
3 sets of 15 reps
30 seconds of active rest in between sets
- Lie flat on your back with your feet flat on the ground, or resting on a bench with your knees bent at a 90 degree angle. If you are resting your feet on a bench, place them three to four inches apart and point your toes inward so they touch.
- Now place your hands lightly on either side of your head keeping your elbows in. Tip: Don’t lock your fingers behind your head.
- While pushing the small of your back down in the floor to better isolate your abdominal muscles, begin to roll your shoulders off the floor.
- Continue to push down as hard as you can with your lower back as you contract your abdominals and exhale. Your shoulders should come up off the floor only about four inches, and your lower back should remain on the floor. At the top of the movement, contract your abdominals hard and keep the contraction for a second. Tip: Focus on slow, controlled movement.
- After the one second contraction, begin to come down slowly again to the starting position as you inhale.
- Repeat for the recommended amount of repetitions.
AB ROLLER
3 sets of 15 reps
30 seconds of active rest in between sets
- Hold the Ab Roller with both hands and kneel on the floor.
- Now place the ab roller on the floor in front of you so that you are on all your hands and knees (as in a kneeling push up position). This will be your starting position.
- Slowly roll the ab roller straight forward, stretching your body into a straight position. Tip: Go down as far as you can without touching the floor with your body. Breathe in during this portion of the movement.
- After a pause at the stretched position, start pulling yourself back to the starting position as you breathe out. Tip: Go slowly and keep your abs tight at all times.
AIR BIKE
3 sets of 15 reps
30 seconds of active rest in between sets
- Lie flat on the floor with your lower back pressed to the ground. For this exercise, you will need to put your hands beside your head. Be careful however to not strain with the neck as you perform it. Now lift your shoulders into the crunch position.
- Bring knees up to where they are perpendicular to the floor, with your lower legs parallel to the floor. This will be your starting position.
- Now simultaneously, slowly go through a cycle pedal motion kicking forward with the right leg and bringing in the knee of the left leg. Bring your right elbow close to your left knee by crunching to the side, as you breathe out.
- Go back to the initial position as you breathe in.
- Crunch to the opposite side as you cycle your legs and bring closer your left elbow to your right knee and exhale.
- Continue alternating in this manner until all of the recommended repetitions for each side have been completed.
OPTIONAL (but recommended)
4 minutes of Tabata to finish it off strong.
IMPORTANT: You’ll notice that I recommend doing a quick 30 second active rest in between each of the sets. This is to keep your heart rate up at all times. I recommend switch up your active rest movements with every exercise you do, just to keep it from getting monotonous and to allow for different muscles to be worked. Some of my favorite active rest movements include: kettle bell swings, air squats, lunges, jumps and running in place. Get creative, but try to not use the muscle groups you are actually using on your lifting exercises, so that those are ready to go when the 30 seconds are up.
PIN ME
Other Workouts You’ll Love:
Disclaimer: I am a certified personal trainer, however, since I won’t be there with you physically to check on proper form and weight selection, do these workouts at your own risk. You should consult your physician or other health care professional before starting this or any other fitness program to determine if it is right for your needs.